Setting up your property access instructions is vital to guests being able to easily enter the unit. There are a few steps to get the most out of SuiteOp’s instructions including the Check-in Summary, Check-in steps, and Check-out steps. Below we’ll explain how to add each!
Where to add property check-in & out instructions
To get to property access settings use the following steps:
-
Open the property from the Properties page
-
Click the Settings tab
-
Click the Instructions tab
Setting your code type
In SuiteOp, property owners can configure access codes for each listing. Here are the types of access codes available:
-
Dynamic: Use this option for smart locks managed by SuiteOp. You’ll be prompted to enter the symbol used after the code on your specific lock, such as a check mark or lock symbol. You can even use emojis!
-
Fixed: Select this option for fixed codes that remain the same, or for locks that use a lockbox or manual key.
-
Import: Choose this if you have smart locks managed by another system. We will import the code from your Property Management System (PMS) and display it in the guest portal.** Property Code:**This code serves as a backup to confirm or validate the personal access code.
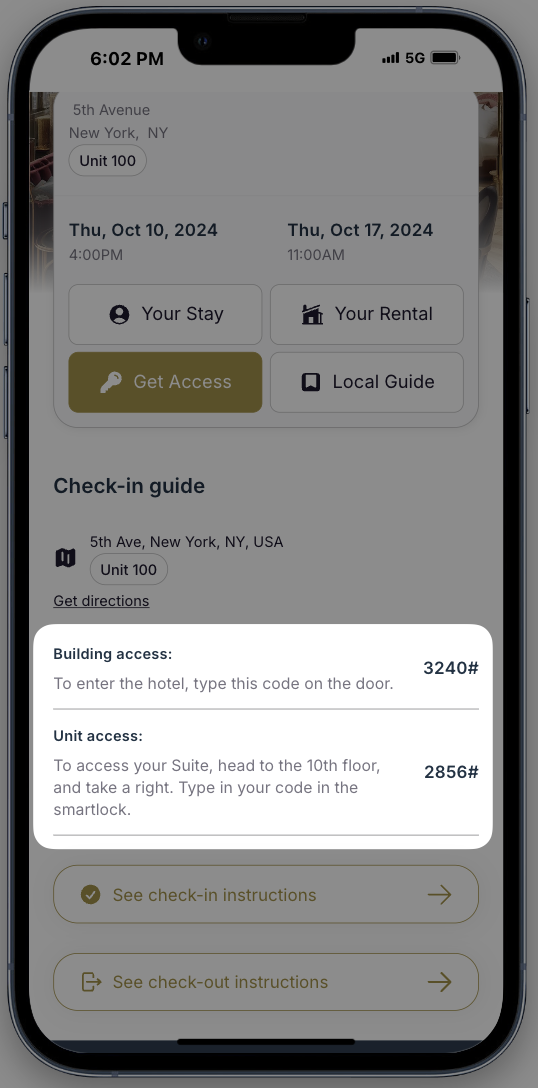
Check-in summary
You can set up a Check-in Summary to be displayed in the Access section of the guest portal. You need to set a unit level summary on each property, and optionally you can create the Building access summary at the group level, or override this per property. This is a good place for a building code or gate coded needed before the door code.
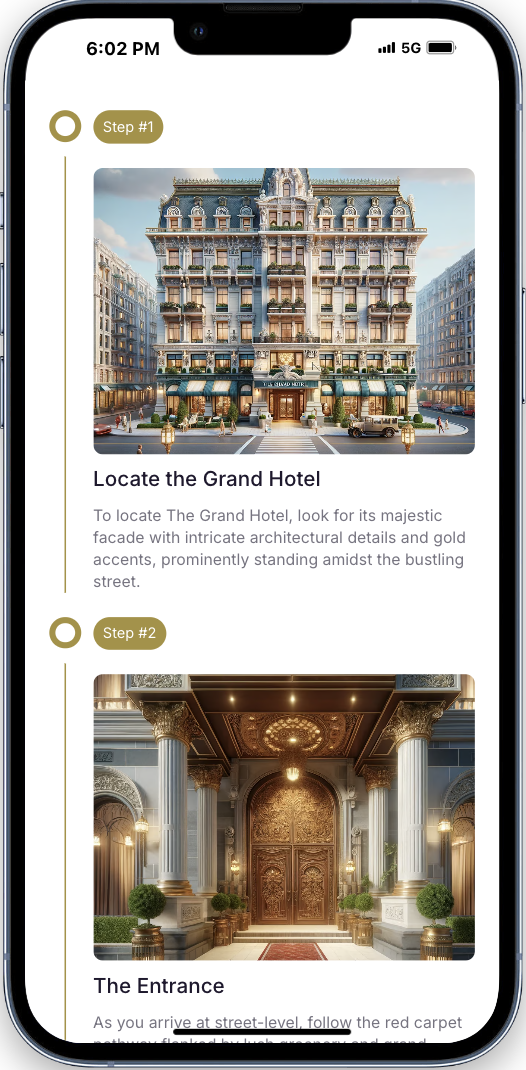
Check-in instruction steps
The check-in instructions will show as step-by-step guide to help guests access the property, without bothering you with questions! Check-in instruction steps should be detailed and include photos of the property.
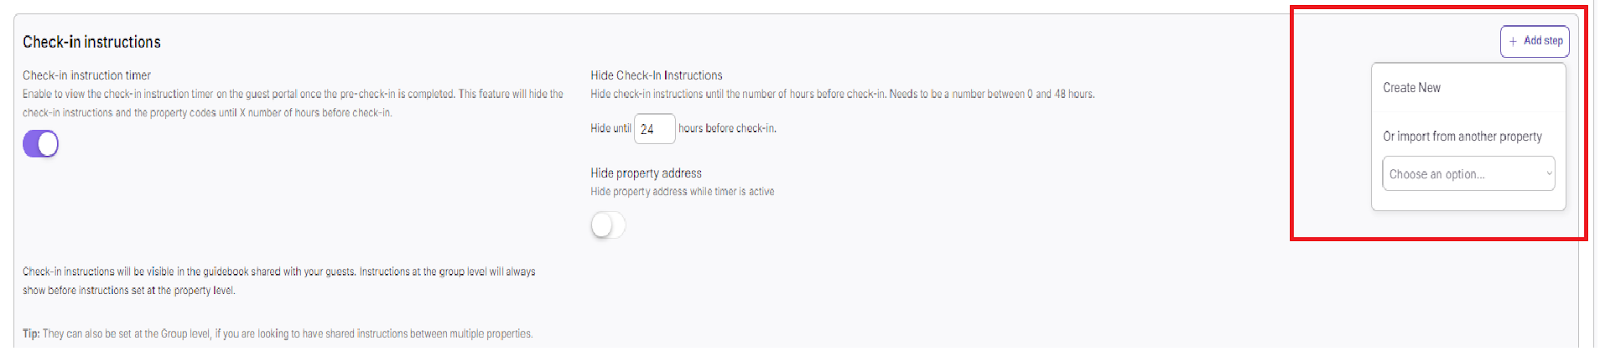
- Click “Add Step” : Users can either create a new step or import steps from existing properties.
-
Create a New Step Upload a cover photo—ideally, use an image relevant to the step, such as the property’s façade.
-
Enter a short description of the step.
-
Provide detailed instructions in the description field.
-
Add an instructional video link (if available).
-
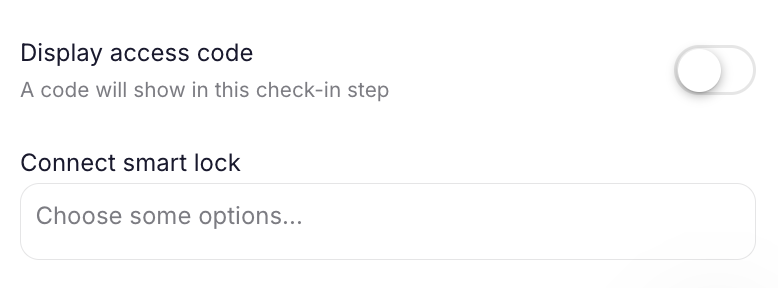
Enable Smart Access to display the access code in the guest portal.
-
Connect to a Smart Lock.
-
Import a Step If many of your instructions across properties are similar you can also use the Import from another property button here:
Select the property from which you want to import a step.
- After selecting the property, available steps will be displayed as options.
Recommended check-in steps
To facilitate a smooth guest check-in experience, we have some recommendations for types of steps to include in your check-in instructions.
-
Finding the Property Add a photo of the property and any details guests have trouble with. Is there a hidden road to turn down that people often miss? Is there a red barn when you make the final right turn? Add any details that are relevant for the property.
-
Parking Add a photo of where they should park. If guests typically arrive by car, parking instructions are helpful to include here to consult when they’re arriving.
-
Head to the Entrance Include a photo of the door that should be used. This is helpful if there is more than one door, or the entrance is hard to find.
-
Enter the code Add a photo of the lock or lockbox. Here you can turn on the setting “Display access code” and then choose to display the dynamic code or fixed code. If you have a smart lock connected to the property, choosing it in the “Connect smart lock” section will enable the Tap to unlock feature.
-
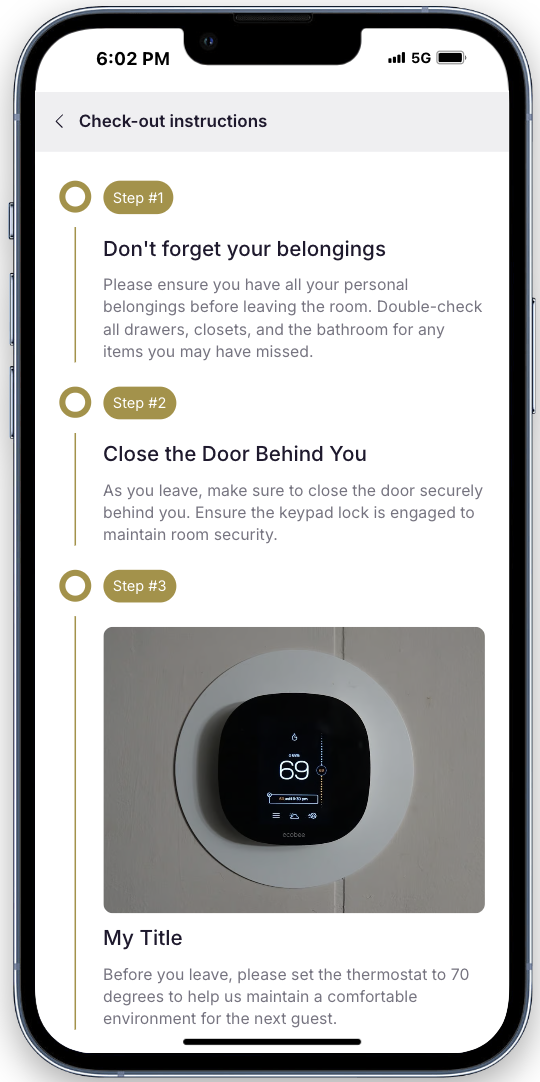
Check-out instructions steps
Check-out instructions are created the same way as check-in instructions. You can both create new or import from an existing property. If your properties all use the same check-in instructions you can set these at the group level to make management easier.
Building (Group) level instructions
Some properties might have two entrances, a common entrance such as a lobby, and a unit entrance. For this reason we have Building level instructions that can be set at a group level. Any instructions added to a group will be appended before the property instructions in the guest portal.
-
Navigate to Properties Page
-
Opposite to the Group name, click on the gear icon
-
Under Access Tab, set up the code type, building code and check-in summary.
-
Set up the instructions:
Click “Add Step” : Users can either create a new step or import steps from existing complex or group.
-
Create a New Step or Import from Another Group Upload a cover photo—ideally, use an image relevant to the step, such as the property’s façade.
-
Enter a short description of the step.
-
Provide detailed instructions in the description field.
-
Add an instructional video link (if available).
Note: Instructions at the group level will always show BEFORE instructions set at the property level.
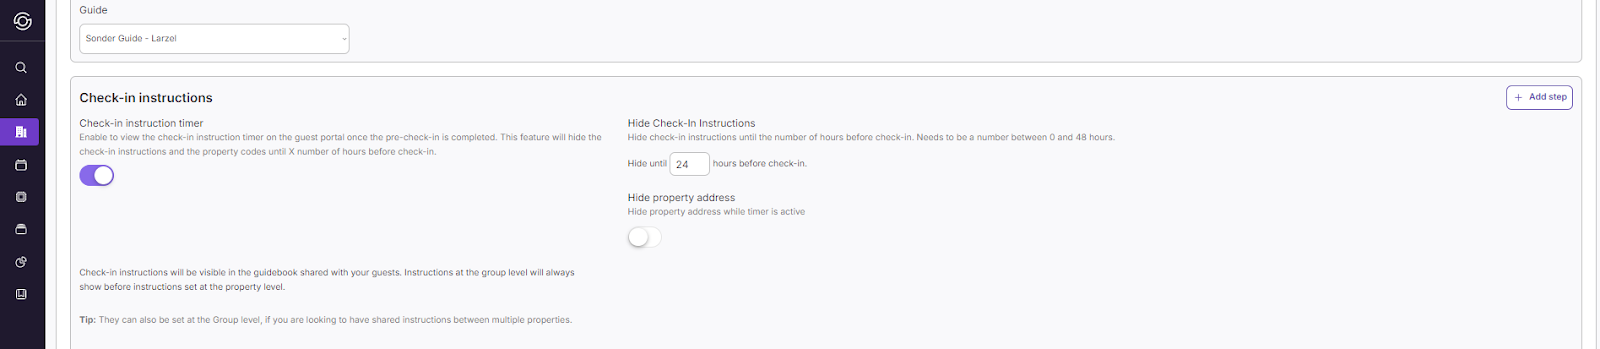
How to block check-in details until X hours before a stay
In the property instructions you have the ability to turn on a check-in timer. This will prevent the check-in instructions from being seen by guests until a set number of hours before check-in. You can also choose to hide the property address. The guest will see a countdown timer until X hours before check-in on the guest portal once the pre-check-in process is completed.