Learn how to create saved views in your SuiteOp environment with these detailed instructions. Save your most-used filters for easier access to the information you rely on most.
1. Go to any screen with filter capabilities
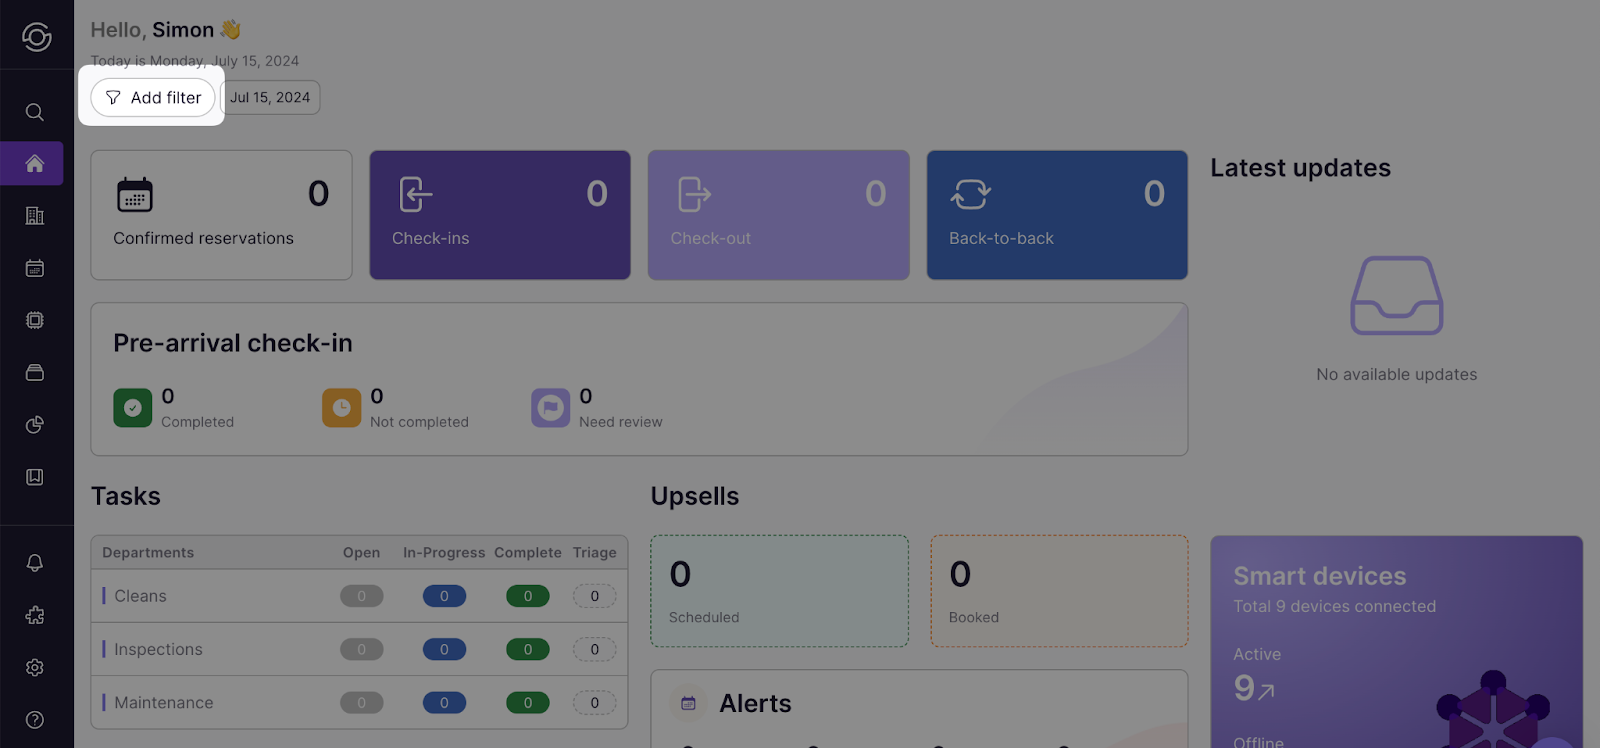
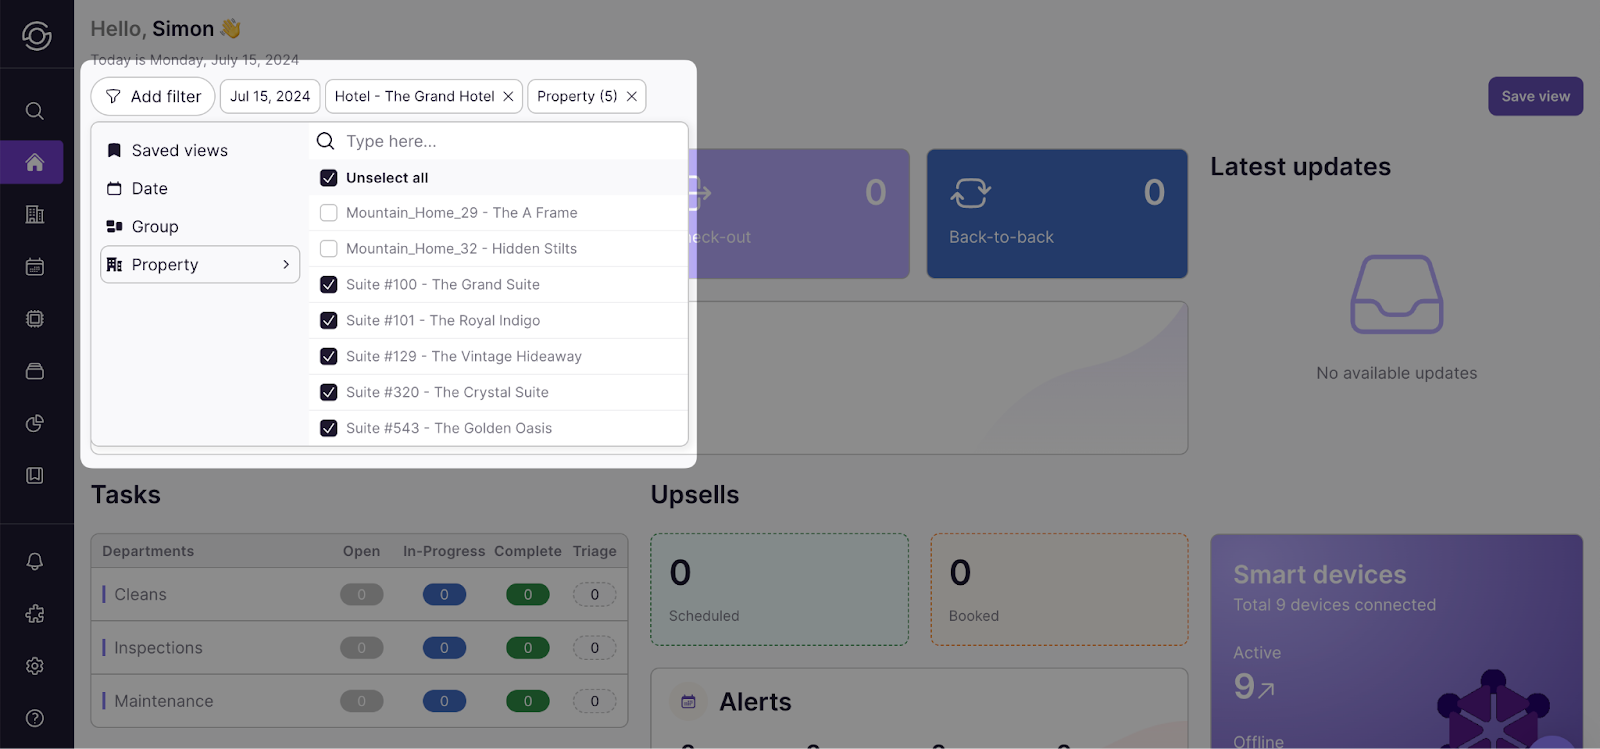
2. Select the desired filters
Choose filters like relative dates and property groups. These options will change based on the screen you’re creating views for.
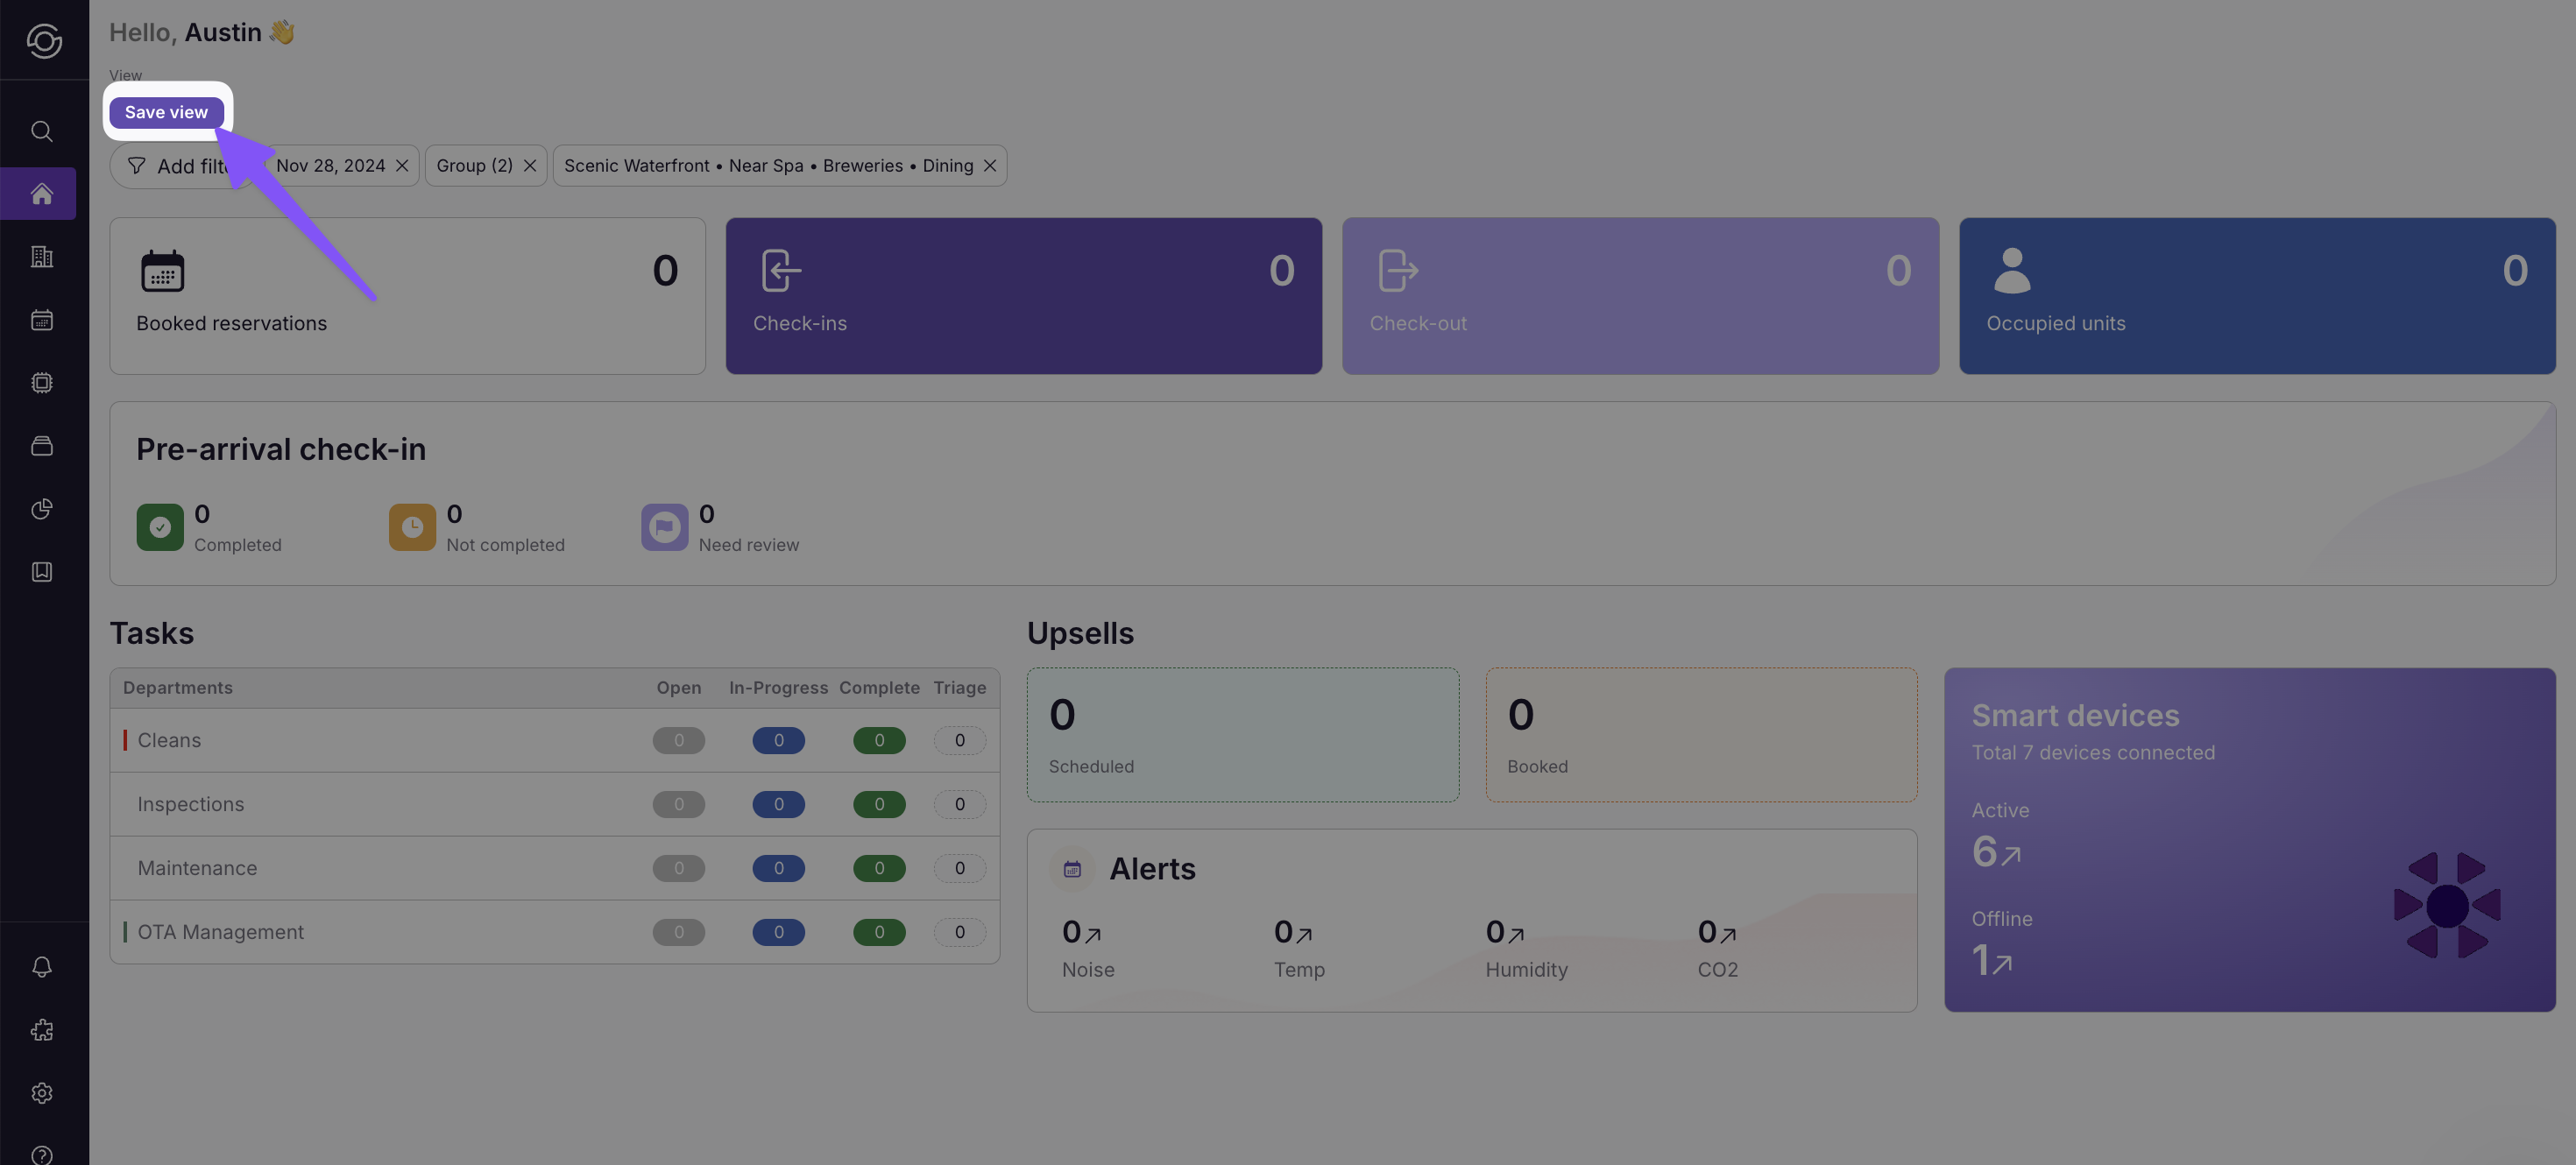
3. Click “Save view” on the top left
4. Give your view a name and choose to add to the organization or keep private
Toggle “Save as default” to make this the default view.
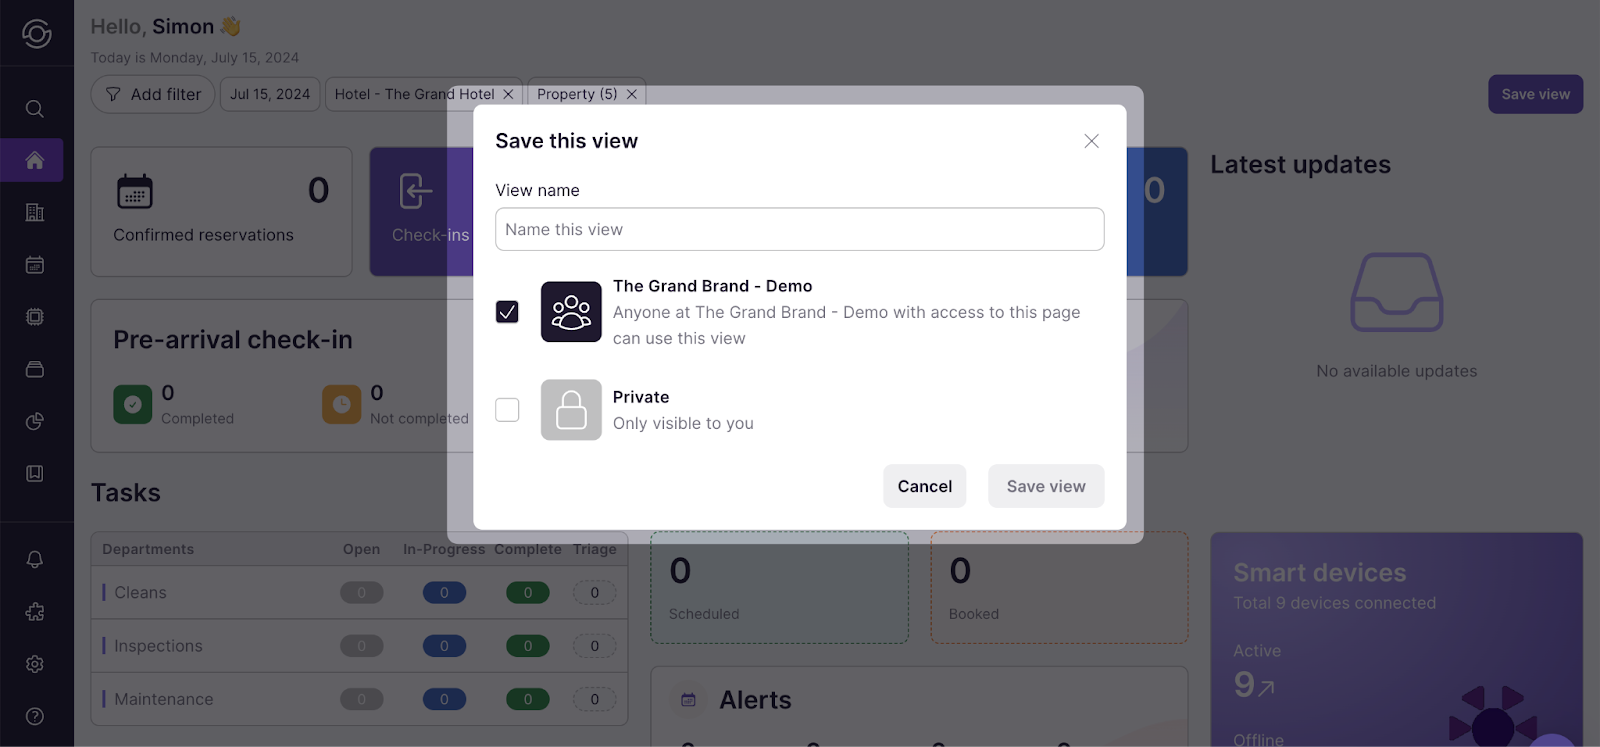
5. Select Save view
This filter combination will now be saved under “Saved views” within the “Add filter” dropdown.
Tip: You can also add views to your “Favorites” list by selecting the star icon in all views.
Last updated on